What I like most:
1. You can knock out a form in a brief amount of time. If you have worked with Promethean software or Smart, Edmodo, etc. then you already have the skill set needed to create forms in Google.
2. Data is collected in Google and stored for you in a nice little spreadsheet. Once all data is collected, you can access the data in a spreadsheet form. This came in handy when I was doing lunch counts for field trips. All I did was print the spread sheet out and give to our cafeteria manager.
3. Easily embeddable into websites. If you use Google Sites, forms are easily embeddable into your website.
4. Saving. Google saves all forms so you can go back and access them easily for the next class or next year.
Once you sign into Google, on the top right of the screen you will see a little 3x3 icon. If you click that, you will find your app choices in a drop down menu. You will notice in this screen that Forms isn't showing. You have two options here: 1. Click more to see all of the app choices and find forms on a separate screen, or 2: Click "Drive." (That's what I did)
Once you click Drive you will arrive at this menu. This is your home screen in Google Drive. You can see that I have folders set up for different documents. On the right hand side you can see current activity. This will show what is going on with documents that you are sharing with others as well. To start a new form, just click "Create."
Once you click "Create" you will get a drop down menu with options. We are working with Forms, so click "Forms."
As soon as you click "Forms" you are given options about the appearance of your form. I use these when I'm working on holiday events or placing things on my website and want them to look better than the default setting. Choose your background and name your form here.
Once you have chosen your background and named the form, you are taking the screen that allows you to create your questions. It looks very similar to Edmodo and ActivInspire.
There are many options for question type. Depending on your purpose some work better than others.
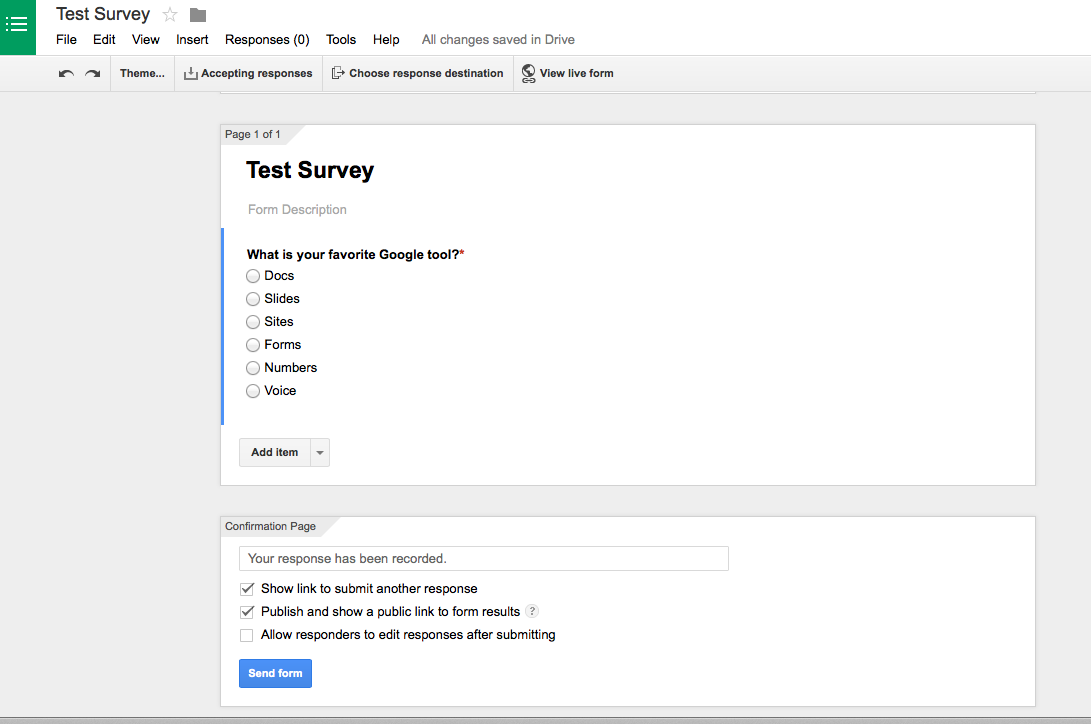
I worked with multiple choice for this tutorial. Once you've added your choices, you have the option of making the question required. *I usually make a "What is your name?" question required for my forms. Then I know who answered what. I learned that lesson really quickly. Once you have added the questions you want, click "Done."
If you want to share your results with the responders, click "Publish and show a public link to form results." You can also allow responders to edit their response after they submit. You then have the option to view the live form. If you click that, you will see what your form looks like.
The above is an example of my live question. Responders choose their answer and hit submit.
After responders respond, they are met with this screen letting them know their response was recorded.

At the top of the screen you will find the word "Responses" When responses are recorded, the number in parentheses changes. If you click responses, you are able to see the results of your form.
You can also view your responses by clicking "View Responses" this will render the spreadsheet. What I love most about the spreadsheet option is that it timestamps responses. If you are running a contest, need an assignment turned in by a certain time, there are no excuses or arguments.
Sound off in the comments about how you would use Google Forms in your classroom this year!


No comments:
Post a Comment
Thanks for stopping by for a visit!