Showing posts with label technology. Show all posts

Tuesday, August 12, 2014

Google Forms

Google Forms is one of my favorite tools in Google.  It has made my life so much easier and allows me to collect data quickly!  I've used Forms to collect lunch information for field trips instead of sending home paper forms, feedback on classroom assignments, classroom surveys, short formative assessments, to gather supplies for class parties, and much more.  It truly is a sweet little tool that is easy to use.

What I like most:
1.  You can knock out a form in a brief amount of time.  If you have worked with Promethean software or Smart, Edmodo, etc. then you already have the skill set needed to create forms in Google.

2. Data is collected in Google and stored for you in a nice little spreadsheet.  Once all data is collected, you can access the data in a spreadsheet form.  This came in handy when I was doing lunch counts for field trips.  All I did was print the spread sheet out and give to our cafeteria manager.

3. Easily embeddable into websites.  If you use Google Sites, forms are easily embeddable into your website.

4.  Saving.  Google saves all forms so you can go back and access them easily for the next  class or next year.


Once you sign into Google, on the top right of the screen you will see a little 3x3 icon.  If you click that, you will find your app choices in a drop down menu.  You will notice in this screen that Forms isn't showing.  You have two options here: 1. Click more to see all of the app choices and find forms on a separate screen, or 2: Click "Drive."  (That's what I did)


Once you click Drive you will arrive at this menu.  This is your home screen in Google Drive.  You can see that I have folders set up for different documents.  On the right hand side you can see current activity.  This will show what is going on with documents that you are sharing with others as well.  To start a new form, just click "Create."


Once you click "Create" you will get a drop down menu with options.  We are working with Forms, so click "Forms."


As soon as you click "Forms" you are given options about the appearance of your form.  I use these when I'm working on holiday events or placing things on my website and want them to look better than the default setting.  Choose your background and name your form here. 


Once you have chosen your background and named the form, you are taking the screen that allows you to create your questions.  It looks very similar to Edmodo and ActivInspire.  


There are many options for question type.  Depending on your purpose some work better than others.


I worked with multiple choice for this tutorial.  Once you've added your choices, you have the option of making the question required.  *I usually make a "What is your name?" question required for my forms.  Then I know who answered what.  I learned that lesson really quickly. Once you have added the questions you want, click "Done."  
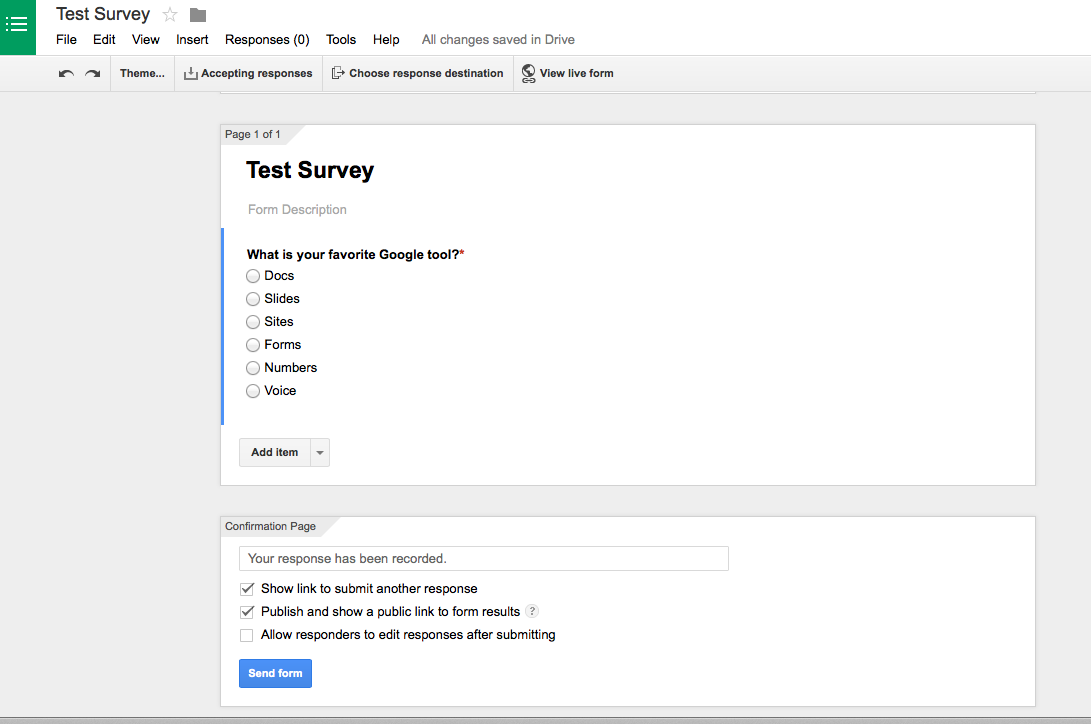


If you want to share your results with the responders, click "Publish and show a public link to form results."  You can also allow responders to edit their response after they submit.  You then have the option to view the live form.  If you click that, you will see what your form looks like.


The above is an example of my live question.  Responders choose their answer and hit submit.


After responders respond, they are met with this screen letting them know their response was recorded.  


At the top of the screen you will find the word "Responses"  When responses are recorded, the number in parentheses changes.  If you click responses, you are able to see the results of your form.

You can also view your responses by clicking "View Responses"  this will render the spreadsheet.  What I love most about the spreadsheet option is that it timestamps responses.  If you are running a contest, need an assignment turned in by a certain time, there are no excuses or arguments.


Sound off in the comments about how you would use Google Forms in your classroom this year!


Tuesday, August 5, 2014

Google Apps...

This year my district has become a Google Education district.  I am so excited about the possibilities that are now available to me through Google.  So, as I learn how to navigate new pieces of Google, I want to share those with you during our Technology Tuesdays.

I've been playing with the apps of the summer and I have to say they are easier to navigate than anything else I've done.  Prior to Google, I used several different providers to accomplish everything that Google does.

Our district websites were hosted by a separate site, email was separate, storage of documents was either on my computer (learned the hard way that when your hard drive dies, so does your storage) or dropbox, pictures in Flickr, etc.  Now everything is in Google.  I've even started using Google Docs as opposed to Word because of the ease of dropping documents into my website.


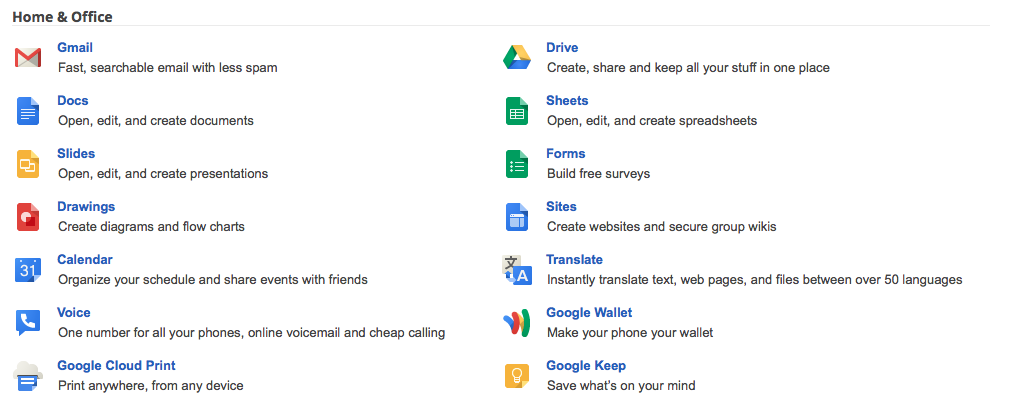
Google is WAY more than just a search engine!  If you haven't explored, take a minute and do so.  The above pictures are just a SMALL sampling of all of the apps that are available.

How do I get started?
In order to embrace the full capability of Google, you will need to have a Google account.  I've been using Google for my email for years now, so if you have a gmail account, you are good.  If not, go ahead and sign up for one and you have all of these wonderful tools at your fingertips!

Over the next few weeks, I'll be highlighting one Google App and how I use it to make teaching easier.  I'll also provide a few tips and tricks to help you and your students manage Google in the classroom.

See you next week!

Tuesday, September 11, 2012

Tech on Tuesday

Another great little app that we've been using in class is Popplet Lite. This is a graphic organizer app that is easy peasy for kids and teachers to master quickly.

This week we have used it to make inferences and observations about primary source documents in social studies, create character maps, and story maps for our novel study.

Things I love:
1. You can import pictures directly into the app from your camera roll or take them within the app.

2. Students can export the file using email in one tap.

3. You can type or write with your finger or a stylus.

4. It is FREE!

Tuesday, July 3, 2012

Tech on Tuesday: Today's Meet

This summer I spent a WONDERFUL two days completely immersed in all things technology at the Upstate Technology Conference in Greenville, SC.  I can honestly say that this conference is one of my favorites to attend and I make it a point to either present or attend every year.  I've gone for the last 6 years and each year it gets better and better.  I've learned countless ways to effectively integrate new technologies into my classroom each time.  It helps to know a good portion of the presenters and the group of amazing leaders who organize and put this conference on each year.  I'm blessed to be a part of this great group.

While at the conference this year, I learned about a new Web 2.0 tool to utilize in my classroom or in any professional development that I may have throughout the year.  Today's Meet is the EASIEST tool to use.  It is FREE and students can easily navigate it as well. It is essentially a message board that allows users to post comments. 

It is a no frills kind of site, which makes it easy to use.  Sometimes I have found that the easier it is, the better so I don't get bogged down in the details.

When you first navigate to TodaysMeet, you will see this screen.

All you have to do is name your room and state when you want the room deleted.  That is one of the features that I love most about this.  I can choose to only have the room open for 2 hours or keep it open for 2 years.

Once you name your room and set the delete date, you can then join the room and begin a conversation.

Because this is SO easy to use, I anticipate using it a lot in the coming school year.  What a great way to have a discussion.  I can see using this as a ticket out the door instead of using post-it notes.  Maybe ending a reading discussion, sharing opinions about current events, etc.  The possibilities are ENDLESS.

Friday, June 22, 2012

Ad Free YouTube...Who Knew?

I stumbled up on a gem of knowledge this week in one of the tech workshops that I taught this week.  Sometimes, it is the simplest things that blow me away.

For years, I've used YouTube in my classroom to introduce concepts, engage students, embrace pop culture, etc.  I have loved it and so have my kiddos.  However, I always spent vast amounts of time utilizing Zamzar as a way to convert a YouTube video to a downloadable file that had no ads.  YouTube wasn't open until recently in my district, and even when it was opened, I was worried about the ads and other videos that show up on the side of the screen.

This week I learned how to avoid all of the extras.  It's so simple that you will not believe it.  All you do is type the word quiet in front of the web address for the video.  For example:

Original address:  http://www.youtube.com/watch?v=cyVzjoj96vs

Quiet address without ads:  http://www.quietyoutube.com/watch?v=cyVzjoj96vs

I cannot wait to utilize this in my instruction this fall!

I Don't Have the Answers...

It's taken me all weekend to begin to process what happened in Parkland, Florida.  I put it aside and compartmentalized it until I...